Process mapping is the solution to your workflow woes if you tend to feel like there are a lot of gray areas and blind turns that slow down your process flow. By including the people involved in a project in the process mapping technique, you can come out not only with a detailed process map but a project management tool that can be cross-functional for anyone in your organization.
In this blog, we’ll dive straight into the topic by covering structure, like types of process map symbols, the benefits of creating a detailed process map, and carefully outline each step in an effective process flow.
What is process mapping?
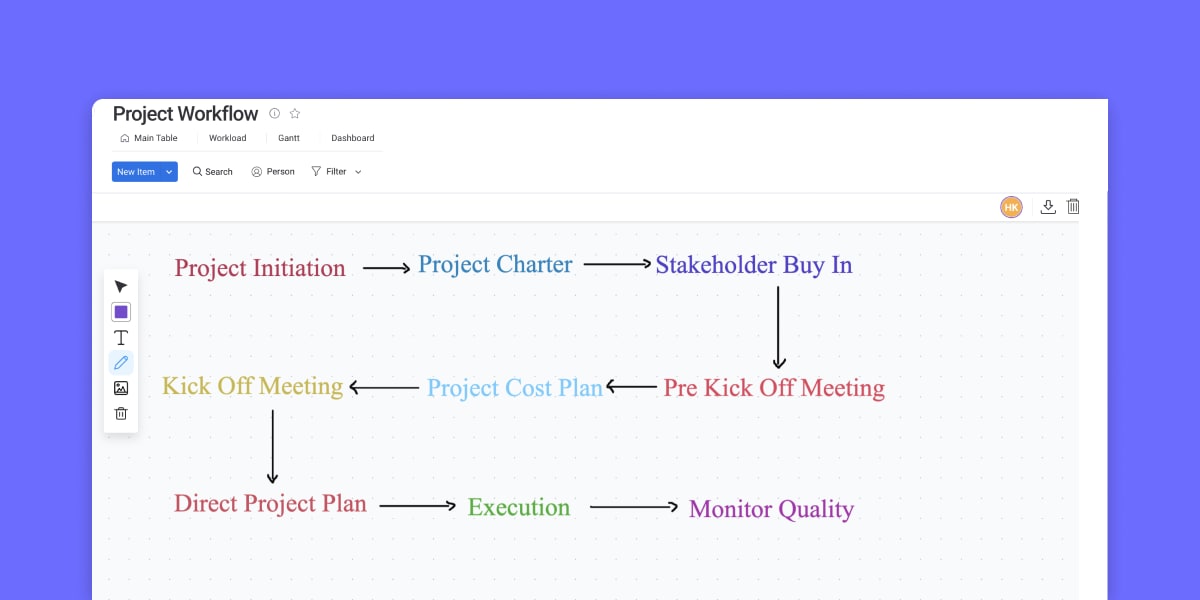
Process mapping provides a visual representation of all the steps necessary to complete a process. You’ll often hear it called a process flowchart, workflow map, or business process mapping.
There are a variety of process maps and there are even more names than the ones mentioned above, like stream maps or high-level process maps. Business process mapping is an important step in your project’s life cycle. When done right, it will carefully map each step necessary to complete your project on time and to the satisfaction of your stakeholders or customers.
More often than not, a process map is used by process improvement teams, but you’ll still find project managers who use it to visually describe the project’s workflow. Generally, you’ll map out your current process, so you have a frame of reference. Next, you’ll map out your ideal process and perform a gap analysis between the two, so you can figure out how to get from “as is” to “to be” as quickly as possible.
What is the connection with Six Sigma?
Six Sigma gives you the tools and techniques to solve complex problems and identify process improvement opportunities. Ultimately, it aims to speed up your processes and reduce the amount of variability and defective elements in your workflow. The most common methodology of Six Sigma is DMAIC, and it’s used for existing products or processes that aren’t meeting customer or stakeholder satisfaction.
Here’s what DMAIC stands for:
- Define: determine the issues you’re facing, opportunities for improvement, and customer requirements.
- Measure: analyze your current internal processes, metrics measured, and current output capabilities. Here’s where you create a process map to better understand where things are going wrong.
- Analyze: determine what’s causing deviations or disruptions to your process.
- Improve: make changes to your process based on your research and ensure all process disruptions or deviations are addressed. At this stage you’d map out your new and improved process.
- Control: make regular adjustments to ensure you get continuous improvement with your current and future processes.
There’s also DMADV, which is used when developing new products or processes. Instead of the improve and control stages, you swap those out for design and verify.
What are the benefits of process map templates?
There are plenty of benefits to process mapping, but here are three of the standouts:
Turning complexity to simplicity
Process mapping is a key part of the project planning process that provides clear documentation for the project. It showcases each process broken down into a logical flow with clear symbols that make it easy to follow.
When creating a business process map, it’s important to remember that perfect is the enemy of good. Your process map will change, so it’s best not to obsess too long over trying to make it perfect. Aim for good, and you’ll be in great shape.Improving team collaboration
A process map provides a clear workflow that gets everyone on the same page and acts as a North Star for the project. It’s easier to assign roles, responsibilities, and process ownership. This also provides some much-needed clarity to team members, project managers, and stakeholders.
Increasing efficiency and providing clarity
A process map will also aid in decision-making, problem-solving, and contingency planning. When performed correctly, it will easily identify redundancies, bottlenecks, problems, delays, waste, and repetitive work. You’ll be able to further facilitate smooth hand-offs and identify scope, so you’re working on what truly matters.
What are the process map template steps?
For starters, you’ll need ample space to start process mapping. A whiteboard is a flexible and forgiving option when creating a process map. So are sticky notes on a window or drawing on paper if you’re in a pinch. However, many companies now use process mapping software for their business process mapping needs, since they make changes easier and can save you time by letting you work from a template.
Now that you have a medium, it’s time to outline the first step:
1. Identify the problem
Answer the questions, “What needs visualization?” and “What problem are we trying to solve?” It’s important to go deep when identifying the problem and break it down as much as possible, so it’s easy for everyone to understand. Having categories will prepare you for step two.
2. Give your flowchart some structure
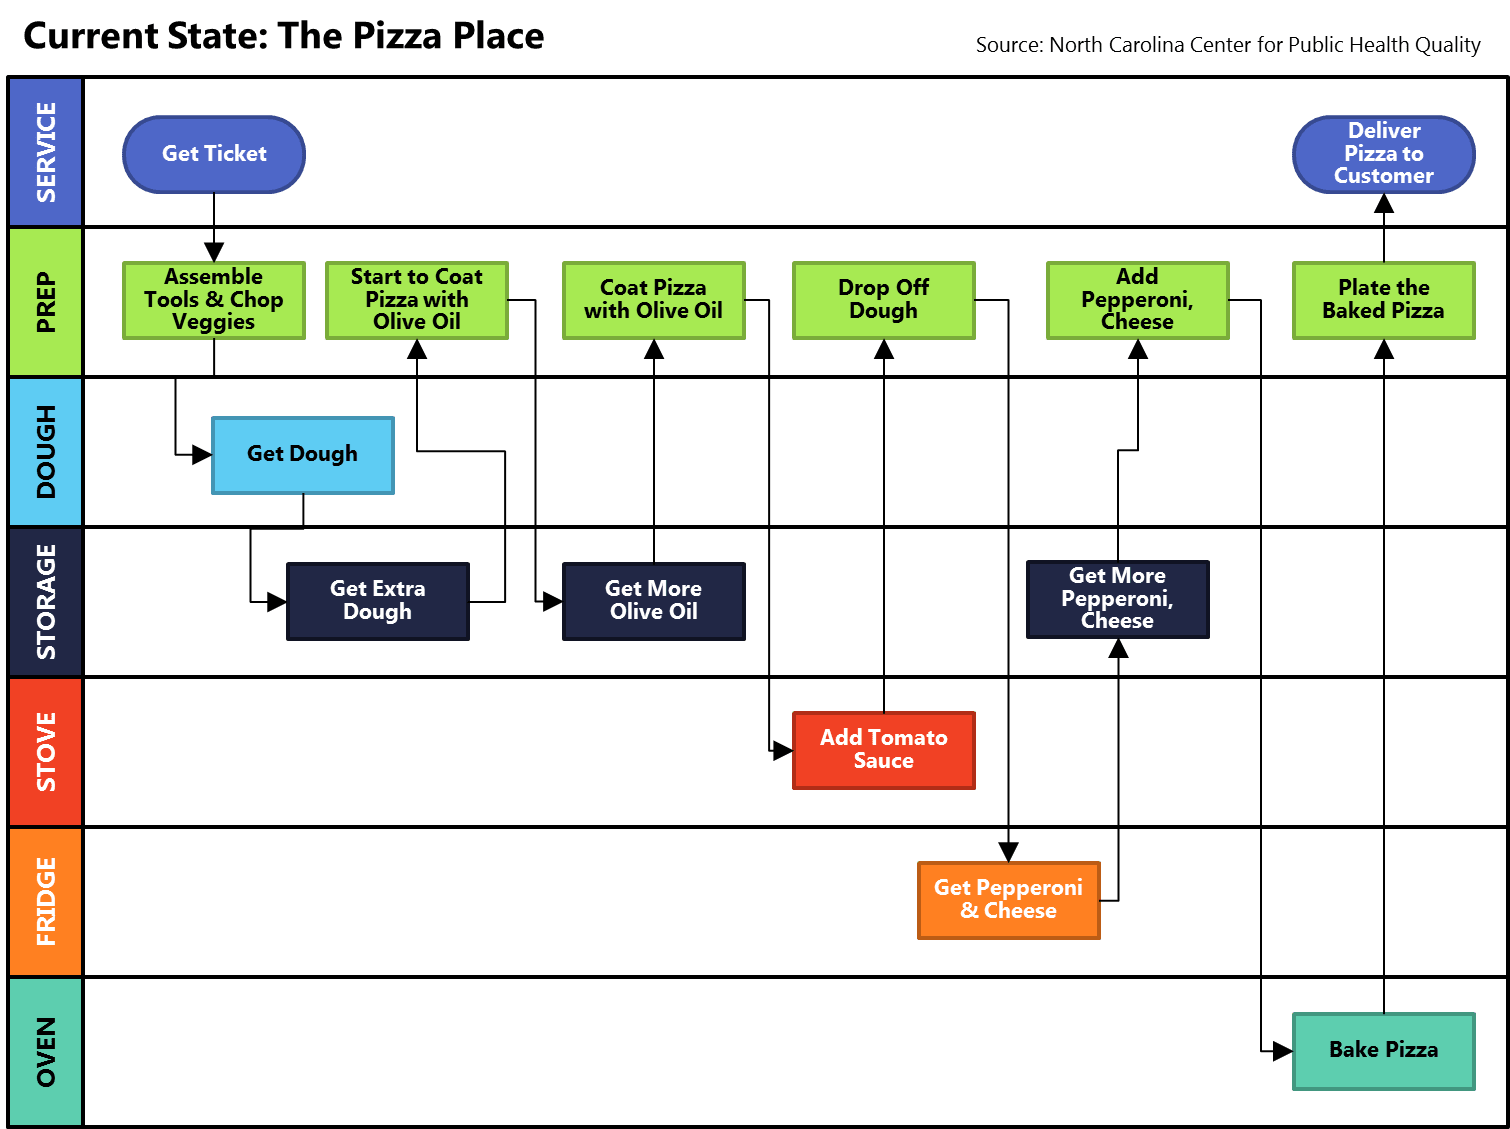
Identify a swimlane for each functional area of the project and determine boundaries for the entire process (i.e., when it starts and stops). The graphic below has clear swimlanes for each functional area of creating a pizza. As you can see, the workflow chart passes tasks through every inch of the swimlane diagram at some point or another.
3. Write down each step of the process in a verb/noun format
Now that you’ve determined the problem and given your process map some structure, it’s time to assess each step of the process. It’s best to write each step as a verb/noun combo such as, “create checklist” or “deliver packet,” to make each step clear and actionable. Try to strike the right balance between too much detail and too little, so the process map stays simple but effective. Keep asking yourself, “What comes next?” until the process is complete.
4. Create an order or hierarchy for the process
After identifying all the steps, it’s time to take a step back and ensure they’re all in the right spot. If they’re not, go ahead and place them in the proper order.
5. Analyze the process map and make necessary adjustments
Finally, take your time and carefully review your new process map to determine if any process improvements are visible or if there’s a step you want to give special attention to.
It’s usually in the fifth step that you’ll detect:
- Value-added activities that directly contribute to creating products or services your customer or stakeholders desire.
- Non-value added activities that use resources but don’t directly contribute to the end product or service.
- Mandated necessary steps that may be required by regulation, statute, or rules.
- Handoffs, rework, waste, and other activities that you can eliminate to create a streamlined process map that has more value to your business, customers, and stakeholders.
Last but not least, get stakeholders to sign off on it so that you can put a bow on the process map and start using it.
What do the process mapping symbols mean?
Business process mapping is often simple, but only if you understand the proper flow for creating one and the symbols commonly used.
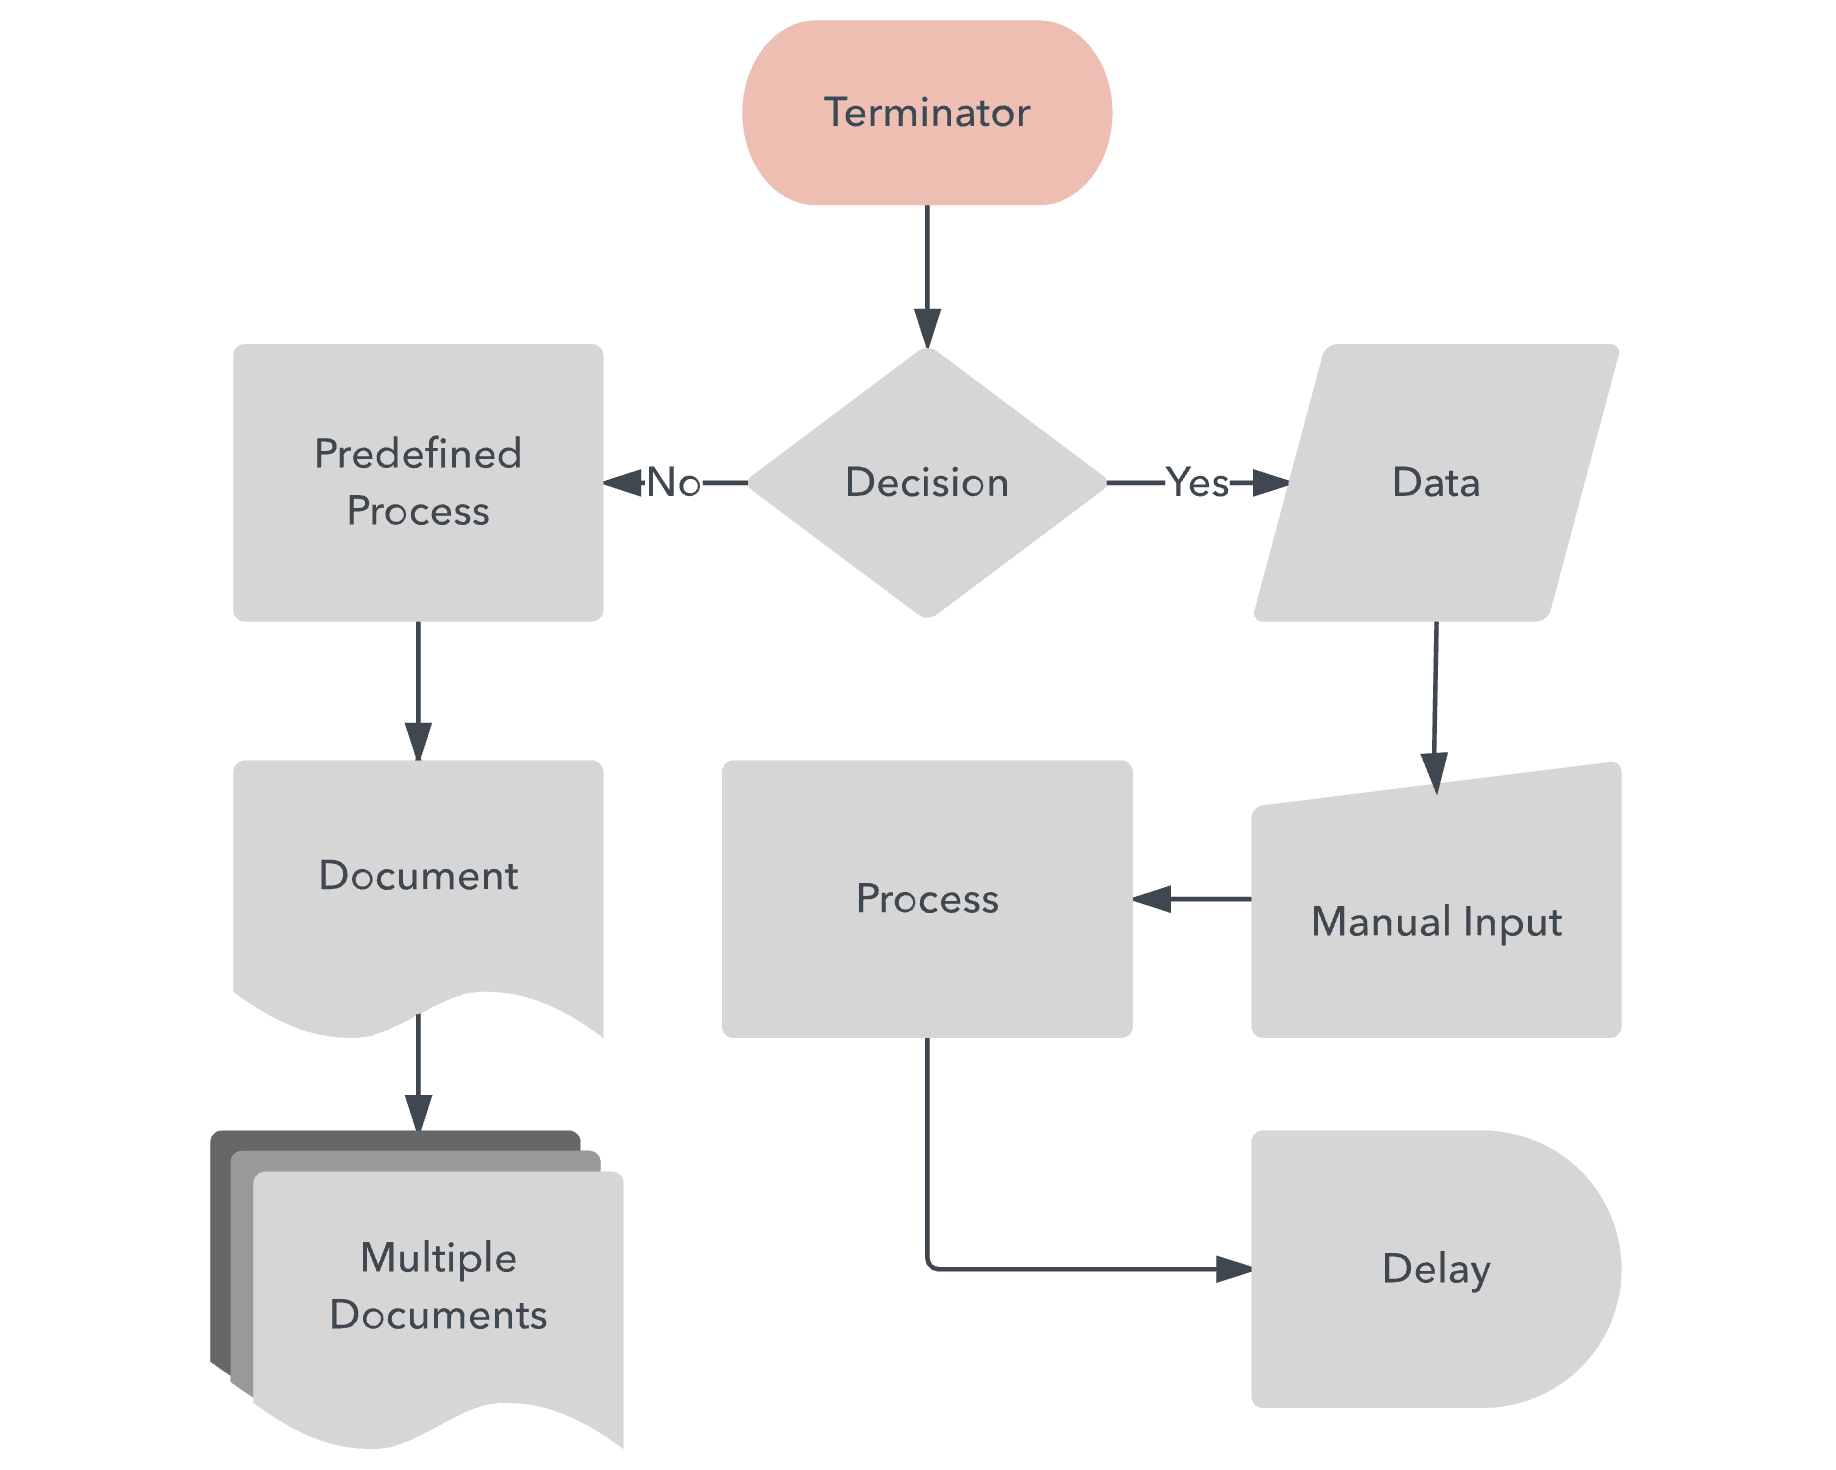
There are quite a few shapes in a detailed flowchart, but here are a few common examples:
In this flowchart:
- Ovals represent terminal activity, or starts and stops.
- Boxes represent steps in the process where people perform tasks or activities.
- Parallelograms require input or output.
- Rombi or diamonds signify steps in the work process that are a decision point.
- A bullet shape (square with a rounded edge) represents a temporary delay.
- Squares with a wavy bottom indicate the use of a written document.
- Arrows demonstrate the flow between each task or step in the workflow diagram.
Should I use a process map template?
In general, it’s a good idea to use a process mapping template. After all, it could be the difference between a basic flowchart and a tool with the right level of detail to get you from A to Z in the most seamless way possible. As you will see, process mapping templates will be a valuable tool for documenting, analyzing, and better understanding your team’s business processes and associated outcomes. Also called process map templates, these models will help you create process maps much faster and much more uniform, so you can re-use them again and again.
In basic process maps in Excel or other process flow map templates out there, the immediate benefits are that you can quickly identify which stages in the process need revamping. You can also bring clarity to the current process status and communication between teams, departments, and stakeholders.
monday.com helps you find your flow throughout your project
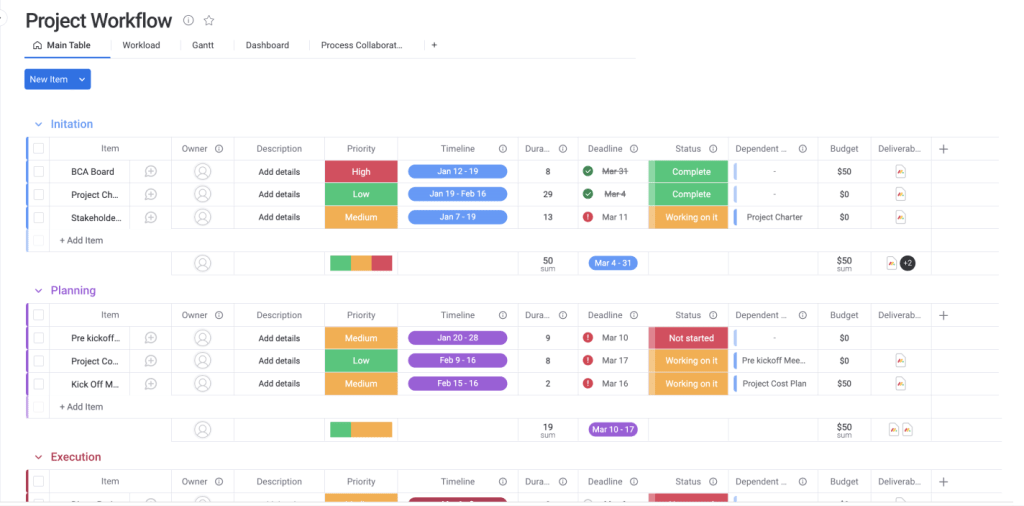
monday.com is a different type of work process software. While it doesn’t create process maps, this Work OS does help you visualize and automate your workflows, so you’re not tied to manual data entry and repetitive actions. monday.com is workflow software that compliments your process map. It’s where you can take the steps from your map and integrate them into your actual work. monday.com lets you plan, automate, monitor, and report on your workflows so you execute and improve them.
Instead of just plotting your process steps on paper or in a chart, with monday.com you can build the workflows, assign team members, automate notifications and alerts, and monitor progress for delays and bottlenecks. Our Work OS also provides a handy centralized location for you to store your process documentation. So that everyone on your team is on the same page and can easily start executing your plan.
Facilitating communication and collaboration amongst process improvement teams and project managers is where monday.com really shines.
As you begin your process mapping journey, keep in mind that a complimentary software solution like monday.com can take your work to new heights.
Get started with process mapping
Process mapping is your ticket to smoother planning and fewer hiccups — start setting up your process map on monday.com


