We’re here to give you actionable tips and tricks to ease the work challenges you face every day, starting with the secret to success!
The secret to success is to manage “the week.” We’ve written a bit in the past about why you should manage your time by the week, but I’ll say it again: You’ll get the best results if you focus on what you want to achieve as a team each week.
We know time management is a huge issue for many people, so we’re going to show you a straightforward solution to increase focus, skyrocket productivity, and be a lot happier working together as a team.
In this post, we’re going to show you exactly how to create a weekly task board for your team based on the best practices that we’ve learned from thousands of super successful teams.
There are a million ways to customize it to serve your exact needs, but if you follow this general structure, you’ll be off to an incredible start.
What’s a weekly task board?
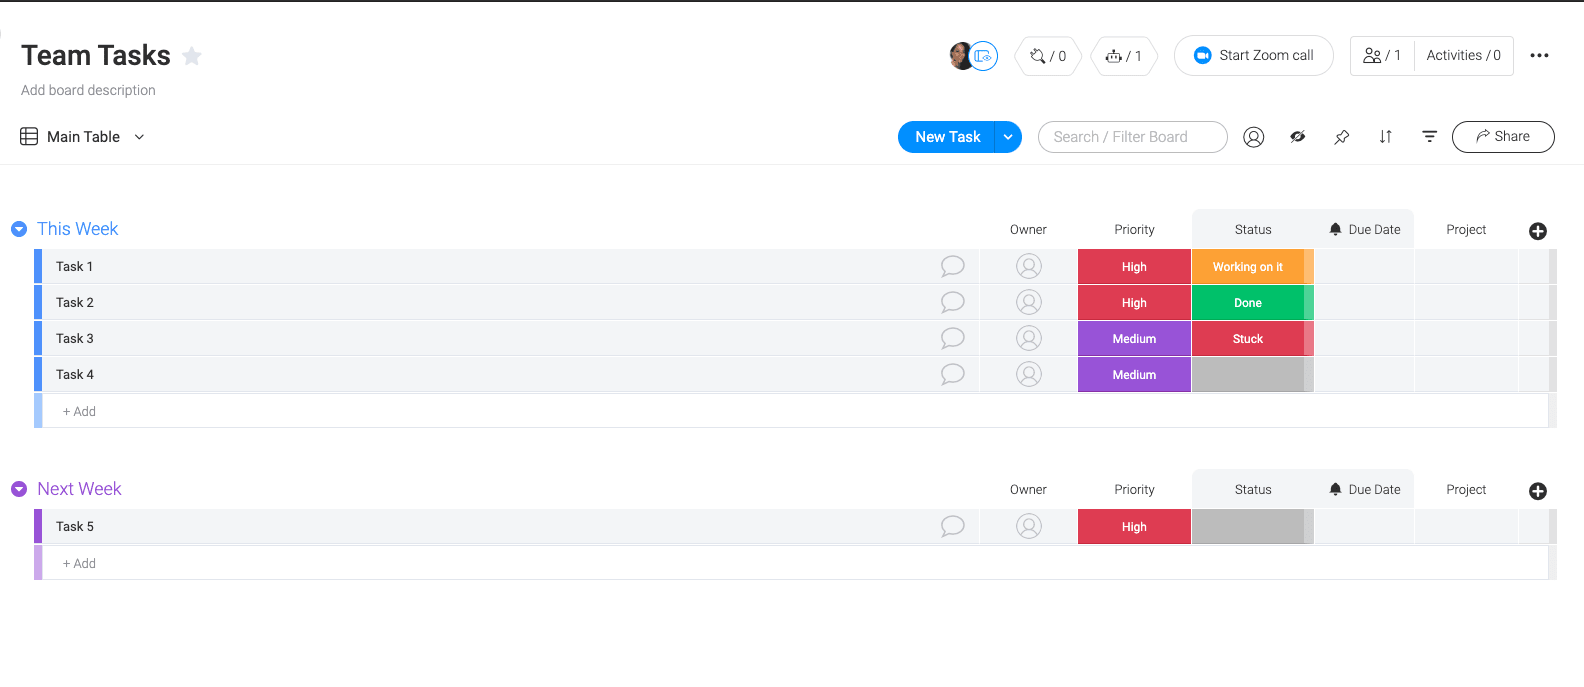
Let’s start with the basics. What’s a “board”? It’s a virtual workspace that allows you and your team to organize whatever it is you’re working on. Within a board, you can create groups listing things you’re working on, and within each group, there’s the list of individual tasks, which we call “items.”
You can create a board to manage just about anything, but the quickest and easiest way to get started is to use our ready-made “Team Tasks” template when signing up, customize it the way you want, and list out everything your team is going to achieve that week. That’s it!
How to customize your board with confidence
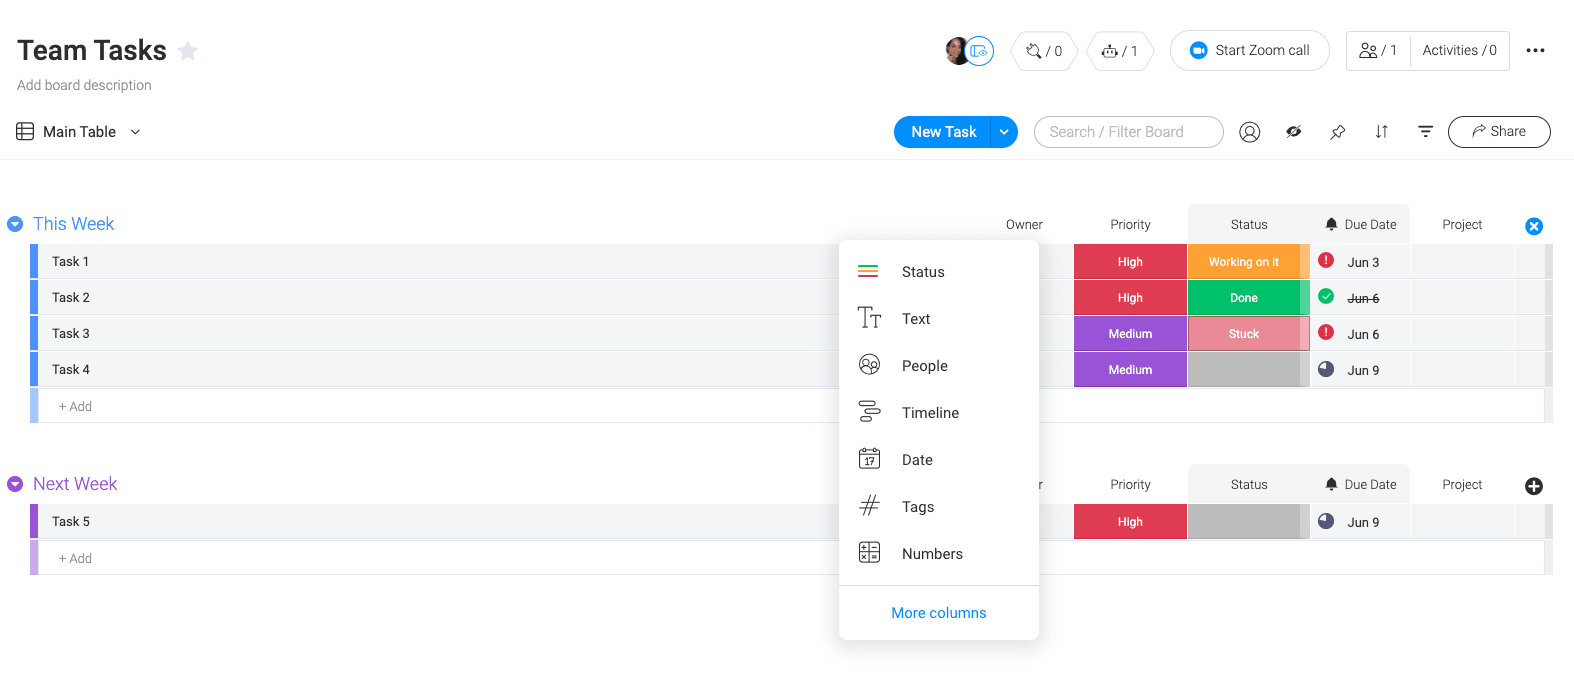
The next step is to understand your column choices, which is how you’ll customize your board to suit your exact needs. monday.com is easy to use but also infinitely customizable, and you have 40 different types of columns to choose from.
The ones you want to start with for your weekly task board are priority, status, person, date, and timeline.
We work with a lot of customers who are delighted to see the number of column types we have, and the good news is, it’s pretty intuitive to add them to your board. Understanding columns is one of the most empowering things you can do because once you get it, you’ll really crack the deeper meaning and unlimited potential of columns in monday.com.
It’ll be like that moment when Neo finally becomes superhuman in The Matrix.
Step 1: Add a person column
Essentials first. You need to know what everyone on your team is working on. In the Team Tasks example we provided, you’ll see we already added a person column for you. That’s where you can assign tasks to individual people on your team. Then, in a glance, you can see who’s responsible for what that week. It’s super helpful.
Step 2: Add a status column (or two)
We’ve also already added two status columns for you. One we kept as a regular status column, which by default has the labels “Working on it,” “Stuck,” and “Done,” and the other one we customized to be a “Priority” column so you can easily see the importance of a specific task with “High”, “Medium” and “Low.”
So, why use a status column? Our favorite reason: it brings color to the board. It also makes selection super easy because there’s no need to manually write in a status or priority.
With tons of different color options, you can customize the labels to say whatever you want.
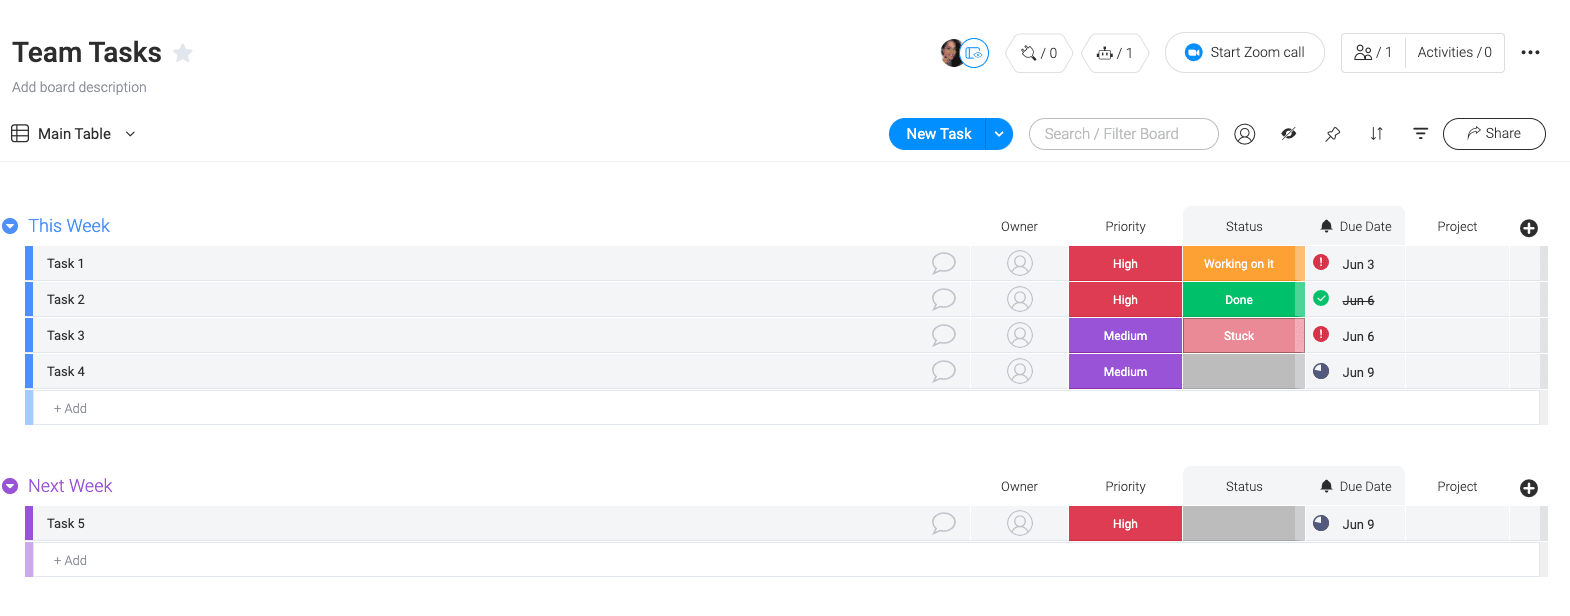
Step 3: Add a date and/or timeline column
The last important step is to give yourself a deadline or visualize the timeframe in which you’ll achieve your weekly tasks. That’s critical to meeting your deadlines.
The date column is where you can put your final deadline, and sync this date with your calendar. Unlike the date column, the timeline gives you a range, from beginning to end. It’s fluid and really allows you to plan for the future and meet your deadline.
That’s all you need to be really, ridiculously, insanely productive as a team! Enjoy!


