
Enterprise work is complex. As priorities shift and teams scale, keeping everyone aligned can be challenging. That’s where monday.com’s AI Work Platform comes in to help enterprise teams stay in sync, turn goals into action, and track outcomes in real time — all from a single connected platform.
In this tutorial, we’ll show you how enterprise teams use monday.com’s AI Work Platform from day one. From setup and boards to automation and dashboards, you’ll see how to bring clarity and control to every layer of work, all backed by AI.
Get startedKey takeaways
- Set up workspaces, boards, and columns to create a structure that fits your team’s workflow from day one.
- Use views like Kanban, Timeline, and Gantt to visualize work in the format that makes the most sense for each project.
- Automate repetitive work with if-then recipes that notify team members, move items, and assign owners without manual effort.
- Collaborate directly on items with updates, @mentions, and monday docs so conversations stay connected to the work.
- Let AI handle more with monday sidekick, monday vibe, and AI Blocks, all features within the monday.com’s AI Work Platform that help teams move faster.
What is monday.com and how does it work?
monday.com is the AI Work Platform that helps teams plan, track, and manage projects in one shared space. It supports project management, operations, CRM, software development, and more, all built on a flexible structure you can customize to match any workflow. Unlike rigid project management systems that force you into a single way of working, monday.com’s AI Work Platform lets you design workflows that reflect how your team actually operates.
Everything on monday.com follows a simple hierarchy. Understanding this structure is the fastest way to feel comfortable on the platform:
| Level | What it is | Example |
|---|---|---|
| Workspace | A folder that holds related boards | "Marketing" workspace |
| Board | A project or process with its own data | Q3 Campaign Tracker |
| Group | A section within a board to categorize items | In progress," "Completed" |
| Item | A single task, request, or record | Write blog post |
| Sub-item | A smaller step within an item | Draft outline |
Teams across departments (marketing, sales, operations, IT, and more) use monday.com to organize work, set deadlines, and collaborate in one place. The platform scales from a single team tracking weekly tasks to an entire organization managing portfolios of projects with cross-functional dependencies.
Explore how different departments use monday.com to see what’s possible for your team.
Step 1: Set up your workspace

A workspace is the top-level container where you organize all the boards related to a team, department, or project. Think of it as a shared folder that keeps everything in one place for the people who need it.
Here’s how to get your first workspace set up:
- Click the + icon in the left sidebar and select “New workspace.”
- Give it a name that matches the team or project it serves (e.g., “Marketing,” “Product launch 2026”).
- Choose an icon and color to make it easy to spot.
- Adjust permissions to control who can view or edit the workspace.
Most teams start with one workspace and add more as they grow. A small team might use a single workspace for everything, while a larger organization might create separate workspaces for each department. The key is keeping boards grouped so team members can find what they need without searching across the entire account. You can always reorganize later by moving boards between workspaces as your team’s structure evolves.
Get startedStep 2: Create and customize your first board
Boards are the core building blocks on monday.com. They organize your work into repeatable, scalable pieces. Each board represents a project, process, or workflow, and everything inside it is fully customizable. Before you create one, it helps to know the three types available:
| Board type | Who can access it | Best for |
|---|---|---|
| Main board | All team members in the workspace | Team-wide projects and shared workflows |
| Private board | Only people you invite | Sensitive work like HR reviews or budgets |
| Shareable board | Anyone with the link, including guests | Client-facing projects or vendor collaboration |
To create a board, click the “+ Add” button in the left panel, choose “New board,” then decide whether to start from scratch or use a template. Templates give you a ready-made structure. You can browse monday.com templates to find one that matches your workflow.
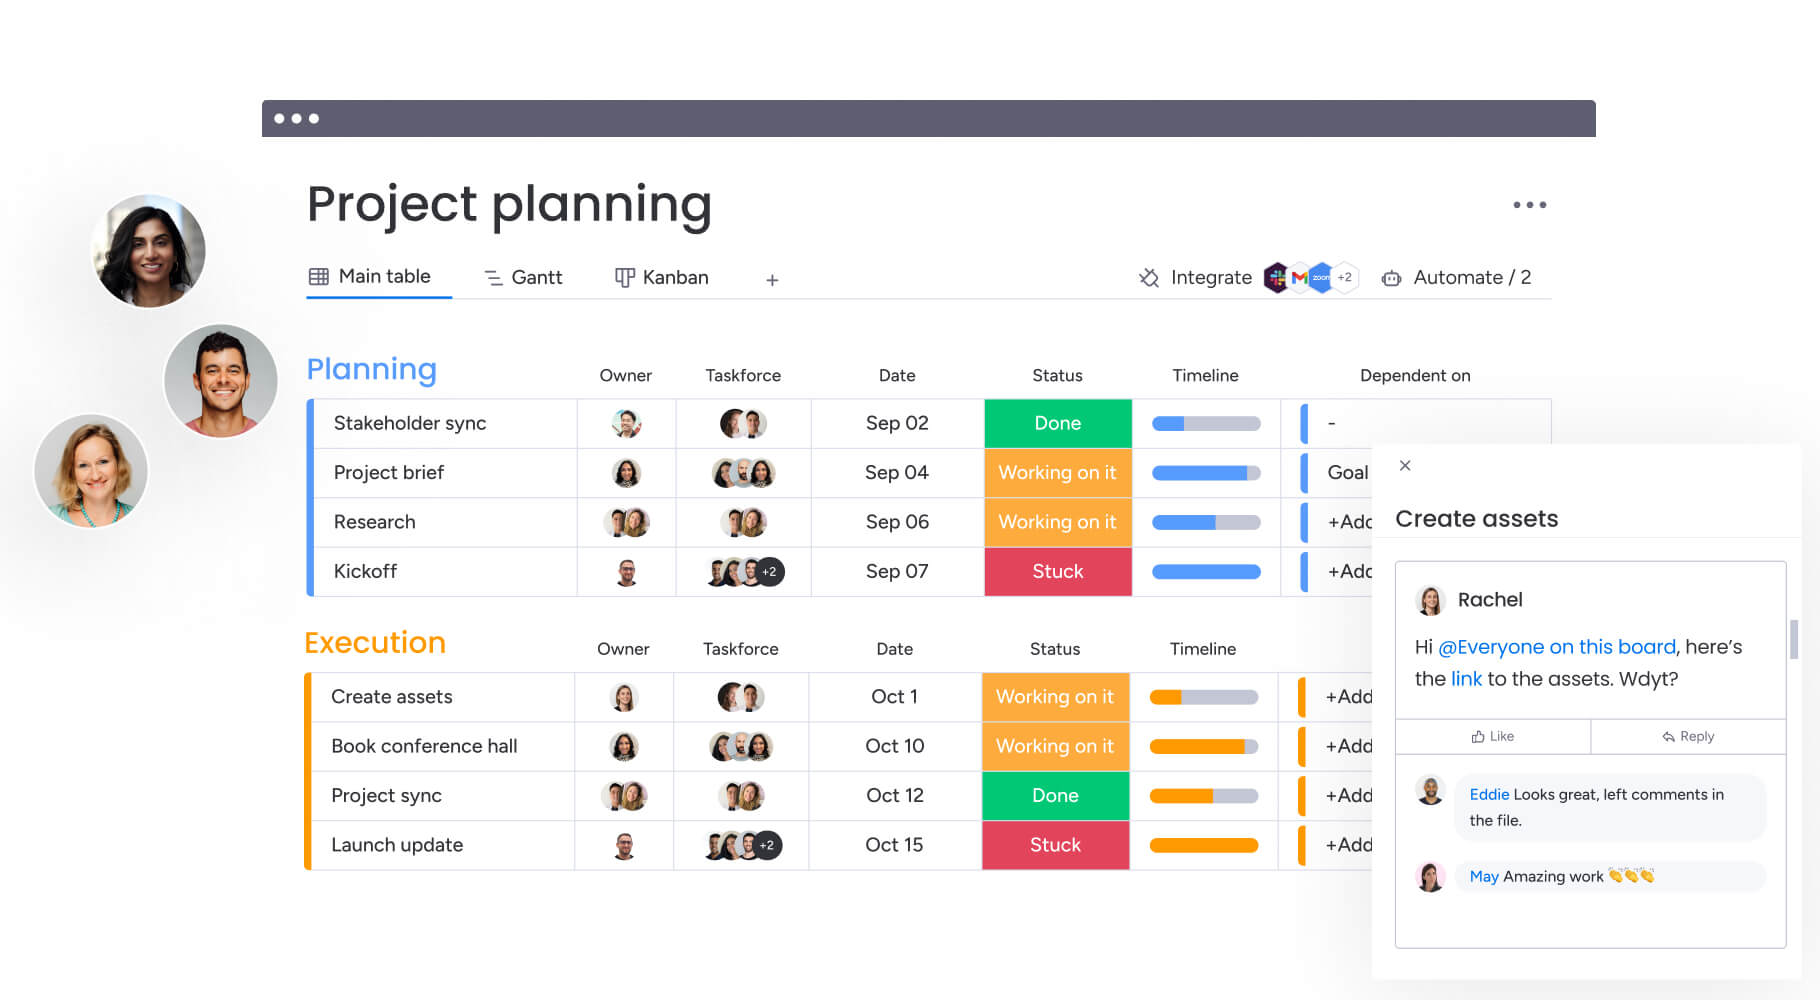
Once your board is created, organize it with groups. Groups are sections that categorize your items (for example, “To do,” “In progress,” and “Done”). Inside each group, add items to represent individual tasks, requests, or records. Need more granularity? Add sub-items to break a single item into smaller steps. You can also color-code groups, collapse them to reduce visual noise, and drag items between groups as work progresses.
Here’s how boards, groups, and items work together:
- Groups: Organize by phase, category, team, or priority.
- Items: Each row is a task, project, or record.
- Sub-items: Break down complex items into smaller, trackable steps.
- Columns: Track ownership, dates, status, budget, and more (covered in the next section)
Step 3: Understand column types
Columns define what information you track on each item. They’re the building blocks of every board, and choosing the right ones makes it easy to filter, sort, and report on your work. monday.com offers dozens of column types, each designed for a specific kind of data.
Here are the column types you’ll use most often on monday.com, along with when each is most helpful:
| Column type | What it does | Best for |
|---|---|---|
| Status | Color-coded labels that show where an item stands | Tracking progress (e.g., "Working on it," "Stuck," "Done") |
| Person | Assigns one or more team members to an item | Ownership and accountability |
| Date | Sets a single date for deadlines or milestones | Due dates, launch dates, review dates |
| Timeline | Defines a start and end date range for an item | Project phases, sprints, campaigns with a duration |
| Numbers | Stores numerical values with optional units | Budgets, hours, quantities, scores |
| Dropdown | Creates a custom list of selectable options | Categories, priorities, or tags that don't need color coding |
| Text | A free-form text field for notes or descriptions | Brief comments, reference IDs, short instructions |
| Formula | Calculates values based on other columns | Automated math: totals, averages, days remaining |
| Connect Boards | Links items between two different boards | Cross-project dependencies, connecting tasks to a master tracker |
You can add columns by clicking the “+” icon at the right edge of any board. Start with the columns that match the data you need to track, then add more as your workflow evolves. You can also reorder columns by dragging them, hide columns you don’t need, and set column permissions to control who can edit specific data. What types of data does your team rely on most?
Step 4: Filter, sort, and find your work
As your boards grow, finding specific items becomes essential. monday.com gives you several ways to cut through the noise and surface exactly what you need.
Quick filters let you narrow a board view instantly. Click the filter icon at the top of any board, then select the column and value you want to see. For example, show only items assigned to you or items with a “Stuck” status. You can stack multiple filters to get more specific.
Advanced filters combine conditions using “and” / “or” logic. This is useful when you need to find items that match several criteria at once, like all items due this week that are assigned to your team and haven’t started yet.
Once you’ve built a filter combination you use regularly, save it as a custom view. Saved views appear as tabs at the top of your board, so you can switch between perspectives without rebuilding filters each time.
Sorting works on any column. Click a column header to sort items in ascending or descending order: alphabetically, by date, by number, or by status. Combine sorting with filters to create focused, actionable views of your work. For example, filter a board to show only “In progress” items, then sort by due date to see what’s coming up first.
Need to find something across your entire account? The search bar at the top of the screen searches items, boards, updates, and files across all workspaces. It’s especially useful when you remember a keyword or item name but can’t recall which board it lives on. How do you currently keep track of what needs your attention across multiple projects?
Step 5: Invite your team and set permissions
A board is only useful when the right people have access. monday.com makes it straightforward to bring in team members and control what they can see and do.
To invite team members:
- Click your profile picture in the bottom-left corner.
- Select Admin, then go to the Members tab.
- Click “Invite new members” and enter their email addresses.
- Assign a role: Admin (full control), Member (can edit), or Viewer (read-only).
You can also invite people directly from a board by clicking the Share button at the top right. This is the fastest way to add someone to a specific project without navigating to the admin panel.
Permissions work at multiple levels. Admins control account-wide settings, while board owners decide who can view or edit individual boards. For sensitive work (like finance reviews or HR records), use private boards to limit access to only the people who need it. You can also use team labels (e.g., “Design,” “Sales,” “Legal”) to group team members and streamline permissions across multiple boards at once.
Step 6: Visualize work with views
The default table view works well for managing items, but sometimes you need a different perspective to spot patterns, track timelines, or identify bottlenecks. monday.com offers 15+ views that let you see the same data in entirely different formats without changing anything on the board itself.
To add a view, click “+Add view” at the top of any board and choose the format that fits how your team thinks about the work. Here are the views you’ll reach for most often:
- Kanban view: Drag-and-drop cards grouped by status. Ideal for teams that work in stages, like content pipelines or sprint boards.
- Calendar view: Displays date-based items on a monthly or weekly calendar. Helpful for scheduling content, events, or deadlines.
- Timeline view: Plots items across a time range so you can see how tasks overlap and track dependencies between them.
- Gantt view: A detailed project schedule with milestones and dependencies. Teams managing complex, multi-phase projects rely on this view to stay aligned. Learn more about how Gantt charts work.
- Chart view: Turns board data into bar, line, or pie charts. Useful for quick visual summaries of status distribution, workload, or budget allocation.
- Workload view: Shows team capacity at a glance so you can balance assignments and avoid overloading anyone.
Each view reads from the same underlying data, so updates made in one view appear everywhere. You can save multiple views per board and switch between them using the tabs at the top. This makes it easy for a project manager to use Timeline view while a designer works in Kanban view on the same board.

Step 7: Communicate and collaborate on your boards
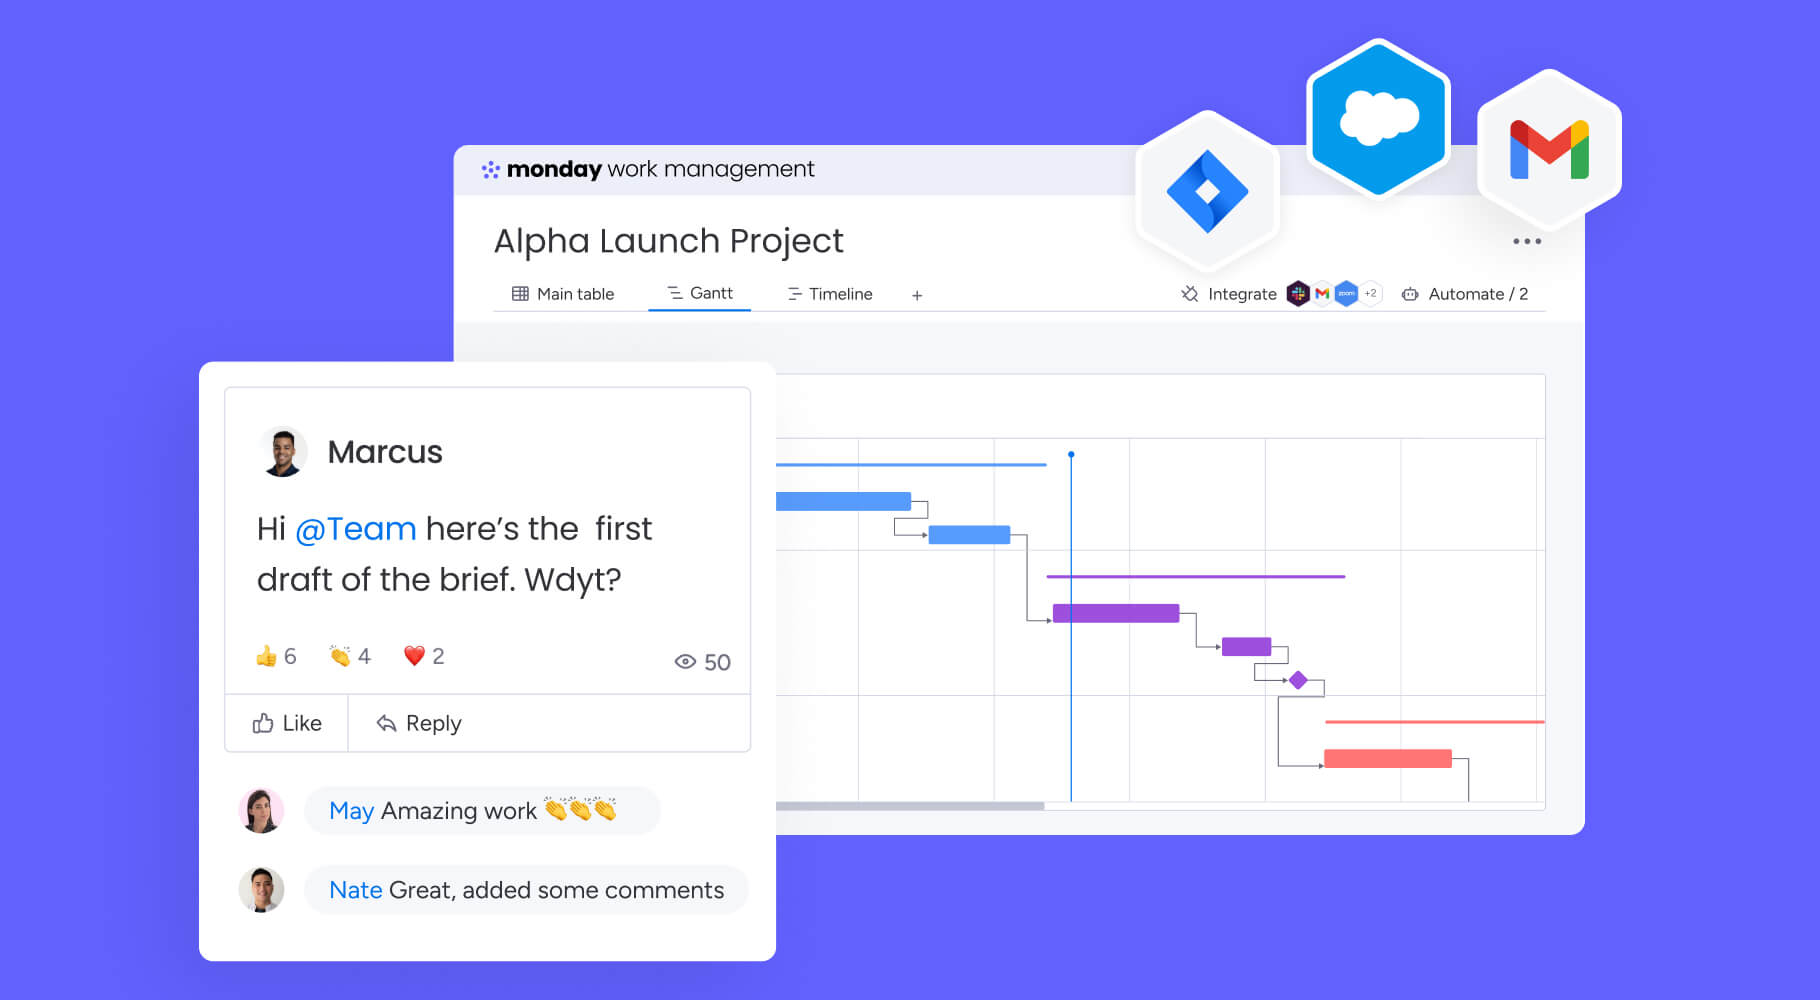
Effective teamwork and project collaboration means keeping conversations connected to the work they reference. When feedback lives in one app and the actual project lives in another, critical details get lost. monday.com builds communication directly into each item, so context stays attached to the work itself.
Every item has an updates section, a conversation thread where team members can post progress notes, ask questions, share files, and tag colleagues with @mentions. When you @mention someone, they receive a notification so they can respond without hunting for the message.
For broader conversations that don’t belong to a single item, use board-level discussions. These are accessible from the board header and work well for team announcements, weekly check-ins, or project-wide decisions. You can also attach files directly to updates, so documents, screenshots, and design assets stay tied to the relevant work.
monday docs takes collaboration a step further. Create documents directly on the platform and connect them to specific boards or items. Docs support real-time co-editing, embedded board widgets, and checklists, so your team can plan, write, and track progress without switching between apps. You can turn a doc into a living project brief that updates automatically as board data changes.
Step 8: Connect your favorite apps
Most teams use more than one platform to get work done. Switching between apps creates friction, duplicates data, and increases the risk of missing something. monday.com integrates with 200+ apps so you can sync data, trigger actions, and keep everything connected without switching between windows.
Some of the most popular integrations include Slack, Microsoft Teams, Gmail, Google Calendar, Jira, and Salesforce. Each one lets you push and pull data automatically between platforms. For example, you can create a monday.com item when a new email arrives, post a Slack notification when a status changes, or sync calendar events with timeline dates on your board.
To add an integration:
- Open any board and click the Integrations button at the top.
- Browse the integration center or search for the app you need.
- Select a recipe (e.g., “When a status changes, send a Slack message”).
- Authorize the connection and configure the details.
Integrations sync data automatically, so your team always works with up-to-date information regardless of which app they’re using. You can combine integrations with automations to build workflows that span multiple platforms. For example, when a Jira ticket is closed, automatically update the corresponding item on your monday.com board and notify the project owner on Slack.
Step 9: Automate repetitive work
Every team has recurring work that eats up time: status updates, notifications, item assignments, follow-ups. Automations on monday.com handle these with if-then recipes that run in the background, so your team can focus on work that actually requires thinking.
An automation has three parts: a trigger (what starts it), an optional condition (a filter that narrows when it runs), and an action (what happens). You set them up through the automation center on any board, and no code is required. The visual builder walks you through each step so you can create automations in minutes.
Here are three examples to get you started:
- When a status changes to “Done,” notify the team lead so they can review the deliverable.
- When a date arrives, move the item to a “This week” group so nothing slips through the cracks.
- When an item is created, assign it to a specific person and set a due date based on the item’s priority.
The automation center includes hundreds of prebuilt recipes covering notifications, item movements, assignments, and integrations with external apps. You can also build custom automations from scratch using the visual builder. Start with one or two automations on your busiest board and expand from there as you identify more repetitive patterns. For more ideas, explore 14 ways to automate team workflows.

Step 10: Stay on top of your work with My Work and notifications
When you’re assigned items across multiple boards, it can be hard to know what to focus on first. Where should you start your day? The My Work view solves this by pulling every item assigned to you into a single, personal dashboard. You’ll see due dates, statuses, and priorities across all your boards without opening each one individually.
Notifications keep you informed without requiring you to check the platform constantly. monday.com sends alerts when someone @mentions you, assigns you an item, or updates something you’re following. You can customize notification settings to control what triggers an alert and how you receive it (in-app, email, or mobile push). Turning off notifications for boards you’re only monitoring casually helps reduce noise and keeps your focus on the highest-priority work.
The inbox gives you a chronological feed of all notifications, so you can catch up on everything you missed in one place. Between My Work and a tuned notification setup, you’ll always know what needs your attention. This is especially valuable for team members who work across multiple departments or projects simultaneously.
Step 11: Track progress with dashboards
Dashboards pull data from multiple boards into one view, giving you a high-level picture of what’s happening across teams, projects, or departments. Instead of opening each board individually, you can see everything that matters on a single screen. This is especially valuable for team leads and managers who need to monitor progress without interrupting the people doing the work.
Setting up a dashboard takes just a few minutes, and you can adjust it anytime as your team’s reporting needs change. Here’s how to create one:
- Click the “+” icon in your left-hand menu.
- Select “Dashboard.”
- Choose the boards you want to pull data from (you can include multiple boards across teams).
- Add widgets to visualize the data you need.
- Customize the layout, filters, and permissions.
Dashboards are fully drag-and-drop, so you can tailor each view by role or function. Here are some widgets to start with:
- Battery: Progress at a glance for any group or board.
- Chart: Visualize breakdowns by owner, status, or priority.
- Numbers: Display totals, averages, or counts from any column.
- Timeline: Surface milestones and deadlines across boards.
Dashboards stay current with live updates from your connected boards. They also integrate with Slack, Microsoft Teams, and Google Workspace, so your data is always accessible wherever your team works. You can create multiple dashboards for different audiences: one for team leads focused on daily execution, another for leadership focused on strategic milestones and portfolio health. What metrics would give your team the most useful picture of progress?
How monday.com's AI Work Platform helps your team
You’ve set up boards, views, and automations. Now AI can take on even more of the work. monday.com’s AI Work Platform brings a suite of AI capabilities directly into the workflows you’ve already built, so teams spend less time on manual work and more time on the decisions that move projects forward. Each feature below is designed to deliver value within the workflows you’ve already created, not as an add-on that requires a separate setup.
monday sidekick is an AI assistant built into every workspace. Ask it to update items, write documents, analyze board data, or surface insights like catching delays you might have missed or suggesting follow-ups based on recent activity. It works at the account, board, and item level, so you can get help whether you’re looking at the big picture or diving into a single task. monday sidekick is also available on mobile with voice interaction, making it possible to manage work on the go.
monday vibe turns plain-language descriptions into fully functional apps. Need a project tracker, an org chart, or a custom dashboard? Describe what you want, and vibe builds it. No code and no design skills required. Anyone on the team can create exactly what they need.
monday agents are AI-powered workers that handle tasks autonomously. Pre-built agents cover common workflows like summarizing meetings, analyzing project risks, assigning support tickets, and scoring leads. You can also build custom agents by describing the role, connecting knowledge sources, and setting guardrails. Every agent includes trust features like audit trails, permissions control, and simulation mode so your team stays in control. Agents are currently in Early Access.
AI Blocks add AI-powered steps to any automation. Categorize incoming requests, summarize updates, detect sentiment in feedback, translate text, or extract information from files. They plug directly into the automation builder you already know and run automatically as part of your existing workflows.
monday MCP (Model Context Protocol) connects external AI assistants — like Claude or Microsoft Copilot — directly to your monday.com workspace. This means you can explore your board data, create items, and manage projects from the AI assistant you already use.
Explore all AI features on monday.com to see how monday.com’s AI Work Platform fits into your team’s workflow.
Get startedYour next steps for getting the most out of monday.com
You’ve gone from setting up your first workspace to building automations and putting AI to work. That’s a solid foundation, and there’s still more to explore as your team’s needs grow.
Here are some resources to keep the momentum going:
- monday Academy: Self-paced courses and certifications to deepen your skills, including video tutorials that walk you through advanced features.
- Enterprise tutorial: See how larger teams use monday work management to connect strategy and execution at scale.
- Community: Connect with other monday.com team members, share ideas, and get answers from product experts.
- Support: Reach the customer success team for onboarding guidance and implementation support aligned to your goals.
Whether you’re managing a five-person team or coordinating across departments, monday.com grows with you. Every feature covered in this tutorial (from boards and automations to AI and dashboards) works together as part of a connected system. Start building the workflows that make your team’s work visible, organized, and moving forward.
Get startedFAQs
What is monday.com used for?
monday.com is used for managing projects, tracking work items, coordinating teamwork, and automating repetitive processes. Teams across departments (marketing, sales, operations, IT, and more) use it to organize work, set deadlines, and collaborate in one place.
Is monday.com free?
monday.com offers a free plan for up to 2 users. Paid plans start with Basic and scale through Standard, Pro, and Enterprise, each adding features like automations, integrations, and advanced views.
How do I create a board on monday.com?
To create a board on monday.com, click the "+ Add" button in the left panel, choose "New board," then select whether to start from scratch or use a template. Name your board, set its privacy level, and begin adding groups and items.
What are automations on monday.com?
Automations on monday.com are if-then recipes that trigger actions automatically. For example, you can notify a team member when a status changes or move an item when a date arrives. You set them up through the automation center on any board.
Can I use monday.com on my phone?
Yes, monday.com has a mobile app for iOS and Android. You can view boards, update items, communicate with your team, and receive notifications from your phone. monday sidekick is also available on mobile with voice interaction.
What AI features does monday.com have?
monday.com includes several AI features: monday sidekick (an AI assistant), monday vibe (a no-code app builder), monday agents (autonomous AI workers), AI Blocks (AI-powered automation steps), and monday MCP (connections for external AI assistants). These are available across plans with AI enabled.